Page History
The following steps outline supervisor instructions to approve or reject a leave request in U4BW.
- Login to Unit4 Business World (U4BW).
Once the employee has submitted their request, it will show up
in the supervisor's top menu under the Task Management icon (check box). Click on the icon to display all tasks.
Select "Absence Approval" from the menu, then click on the blue highlighted task to view requests.
The screen will display the details of the request:
At the bottom of the screen, the supervisor can choose to "Accept" or "Reject" the request.as a 'Task'. The number of 'Tasks' you have is indicated by an orange number beside the checkmark icon in the top right of the screen:

Info The number represents the number of individual tasks. Absence request tasks are grouped by employee. In this example, Liana has 1 request from Devin, 1 request from Andrea, and 3 requests from Matthew. You can open a task a few different ways:
From the drop-down menu (click on the checkmark), you can click on the task itself:

Info This will go directly to the 'Absence approval' screen. Quick and easy for reviewing single tasks.
- You can also open a task from the 'Task management' screen. There are three ways to open 'Task management':
- Click on the blue button at the bottom of the drop down:

- From the main menu, click on 'Common' → 'Task management'

- Use the search box at the top right:

- Click on the blue button at the bottom of the drop down:
Once you're in the 'Task management' screen, you can filter your open tasks by due date or task type. To open an absence request, click on an employee with task type 'Absence: Approval'.

Info The 'Absence approval' screen will display all of that employees active requests! 
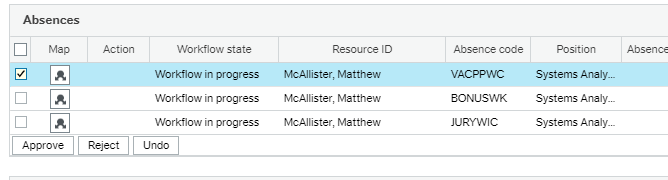
- Absence approval will open in 'Advanced mode'. This will let you action each request individually. In this example we're going to approve the first request, reject the second request, and leave third request for later. Start by selecting the checkbox at the left of the line you want to manage:
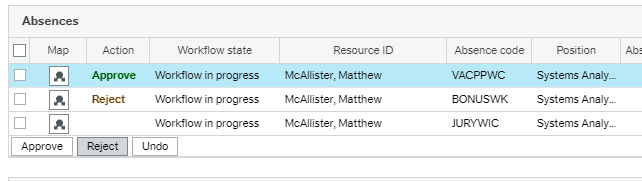
- Then click 'Approve' to approve to set the 'Action' for that line item:

- Select the checkbox on the second request:

- Then click reject:
To add a note for the employee, click on the request to highlight the line blue, then enter your note below the 'Workflow log'. You do not need to press enter, just type the note in.

Info If you click 'Copy', it will copy your comment to all of the other line items. - To save your Actions, click 'Save' near the bottom:

- If you want to approve or reject all of the employees requests the same way, you can use 'Simple mode'. Click on 'Simple mode' at the bottom:

'Simple mode' enables the large 'Approve' and 'Reject' buttons at the very bottom of the screen.

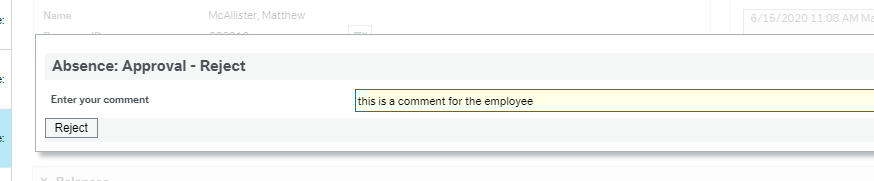
Note When you click on 'Approve' or 'Reject' in 'Simple mode', it will perform that action for all of the requests. Be sure to only click after reviewing all of the line items! - If you use the 'Reject' button in 'Simple mode', the system will prompt you for a note:

- If the request is accepted, the workflow will end and the request will move to "'Approved"' in the employee's Absences landing page.
- If the supervisor rejects the request is rejected, the system will prompt for a comment and return therequest to theemployee.

The employee will need to modify the request and resubmit for approvalthe workflow goes back to the employee. They will see a task called 'Absence: More Info'
- They will also see it in the 'Rejected' section of their absences:

- When they open the Absence request to review, they will see your note at the top of the page:

- They can change the dates, add a note, or change the reason. After they click 'Send for approval' it will come back to you for action.
| Info | ||||||||||
|---|---|---|---|---|---|---|---|---|---|---|
| ||||||||||
|