Page History
In This Article:
| Table of Contents |
|---|
Submit a Purchase Request
The following steps outline instructions to submit a purchase request in Unit4.
- Navigate to "My Employment" and click on "Purchasing".

- In the purchasing screen, click on "Purchase request".

- The following screen will open:

- Fill in the highlighted fields:
- "On behalf of requester" – this would be the person you are purchasing for. It defaults to the user.
- "Purchase request name" – this can be left blank, or you could name this purchase request for your own reference later on.
- "Message" – put any message that you would like to go to Purchaser or Approver.
- "Delivery date" – put in the date that you wish to have the purchase delivered.
- "Delivery to" section - specify the purchase details and delivery details. NOTE: DO NOT select the general delivery address with your employee name on the title. This will send to your home address. Always select a campus to have your purchases delivered to
- Click on "Add product" to add the product line.
- There are three ways to select the product you wish to purchase:
Start typing your product name in the "Product" box, you may or may not find a match.
Press the spacebar in the"Product" box, this will load the first 50 products in a drop-down menu.
Select the three black dots or ellipsis (...), this will open a value lookup screen to give you a comprehensive search of all products.
After the product is selected, the "Product description" field is defaulted to a very generic description, here you can edit to reflect the item you need.
Example: The product description might be "Supplies" but you are needing staplers, here is where you would change the description to be "Staplers"
Tip Enter all of your product/service details in the "Message" box - this is an internal message box for the Buyer only. You can specify make, model, must-have features, and any detail you need to be considered for your purchase.
Example: Add "Swingline Heavy Duty Stapler, Grey, Model Number: (7471139002) from Staples" to give the Purchaser more information on exactly what to purchase.- Enter the "Quantity" and "Price".
- If the product code ends in "Q", then both the quantity and price fields are editable, as these are for the products that will be received based on the quantity.
- If the product code ends in "A", then the quantity field won't be editable, as these are for the products that will be received based on the amount only
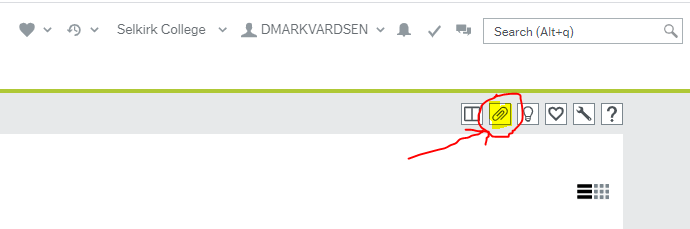
- Click on the paper clip icon (
 ) on the top right corner to attach a document with the request, or on the product line to attach a document with each product line:

- .
- Click the "
 " icon on the product line to enter the Work Order responsible for paying the costs.
- "Account" - default to the correct GL expense account based on the product you have picked in the previous screen. There is no need to change it.
- "Cost centre", "Fund" and "Work order" – Enter the work order you are assigned with if the purchase is for yourself.
- If you are purchasing on behalf of others, make sure to enter their assigned work order instead.
It's to ensure the cost of the purchase gets recorded to the right place.
"Cost centre" and "Fund" will be populated once "work order" has been entered. There is no need to change them.
- If you are purchasing on behalf of others, make sure to enter their assigned work order instead.
- "Tax code" should default the correct value based on the product you have selected. There is no need to change it.
- Click on the "Product Text" tab in the following screen to add detailed descriptions of notes to the product you wish to purchase. This information is very important so that the purchaser could buy the right product. Please refer to the example given in step 7.
- Click "Done" to return to the purchase request screen.

- ***NOTE: You must enter a Work Order for each product line or you will not be able to send your purchase request
- To delete or copy a product line, select the line and click the applicable button.

- After all information has been entered:

- To submit, click "Send for approval" at the bottom of the purchase request screen to initiate the workflow. The Purchase Request will be delivered first to Purchasing for supplier information and quotes, then to the approver based on the work order and amount. Once fully approved, the Purchaser will convert it to a Purchase Order and forward to the supplier.

- If not ready to submit, the request can be saved as draft and be sent at a later time. You will see it saved in the Purchase dashboard under the "Draft" box.

If you receive this error message, check that you have selected the magnifying glass icon to enter the Work Order responsible for paying the bill!
- To submit, click "Send for approval" at the bottom of the purchase request screen to initiate the workflow. The Purchase Request will be delivered first to Purchasing for supplier information and quotes, then to the approver based on the work order and amount. Once fully approved, the Purchaser will convert it to a Purchase Order and forward to the supplier.
| Info | ||||||||||
|---|---|---|---|---|---|---|---|---|---|---|
| ||||||||||
|
Revise a Submitted Purchase Request
- Navigate to "My employment" > "Purchasing"
- Click on "In progress". This will produce any expenses you have submitted that are still in progress.
- If the purchase request is still visible here, you are able to open the request, make the necessary changes, and resubmit for approval.

- If the request has already been approved, please contact the Purchasing Department.
- If the purchase request is still visible here, you are able to open the request, make the necessary changes, and resubmit for approval.
Check the Status of a Submitted Purchase Request
- After a purchase request has been submitted, its status will display on the purchasing screen:


- To view additional details for your requisition, go to "My employment" > "My activities" > "My purchases".

