How to Configure Microsoft 365 2FA Options For Your Account
Prior to 2FA being enabled on your Microsoft 365 account, you should setup your notification options to ensure your access does not get blocked.
Note: If 2FA is enabled for your account, and you haven’t yet stepped through the setup process, you will automatically be redirected to the site below to complete the MFA registration process before you are allowed to connect to Microsoft 365 services.
To preconfigure your Microsoft 365 account MFA options;
- Go to the address https://aka.ms/mfasetup
- Sign in using your Office 365 account


3. Select the secondary authentication method you want to use for MFA
4. To use the Microsoft Authenticator application, select Mobile app and click Next

5. When using the Microsoft Authenticator app on your mobile device, you can choose to either;
- have the app provide you a PIN code that must be entered when you authenticate
- have the mobile app display an Approve or Deny connection prompt on your mobile device
Choose the method you wish to use and click Set up

6. Follow the steps provided on the next screen

7. You should receive a notification from the Microsoft Authenticator application which validates the application is configured correctly with your account.
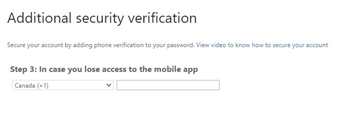
8. You will be prompted to provide a secondary verification method in the event the Microsoft authenticator is not available or not functioning
9. Once this final step has been verified, the registration process is complete
10. Finally you will receive a summary page showing your configuration options

11. To exit, click your login name in the upper right corner of the browser and select Sign out.
You can always revisit the link https://aka.ms/mfasetup to update or change your 2FA options